Minecraft 1.21 Iron Farm Guide (Java + Bedrock): Easy Village Design, Spawn Rules, and Real Output

Minecraft 1.21 Iron Farm Guide (Java + Bedrock): Easy Village Design, Spawn Rules, and Real Output
Build a reliable iron farm in survival with precise villager setup, platform math, troubleshooting, and upgrade paths.
March 25, 2026
Why this guide is different (and why most iron farm videos fail later)
If you searched for minecraft iron farm 1.21, you already know the problem: a lot of farms work for ten minutes, then output crashes, villagers desync, or golems spawn outside the kill chamber. This guide is built for long-term survival reliability, not just a flashy first test.
You will learn:
- Exact iron golem spawn constraints that matter in 1.21
- What changes between Java Edition and Bedrock Edition
- How to choose a build location that prevents outside spawns
- How to diagnose low rates using a practical checklist
- How to scale from “starter farm” to “base-level industrial” safely
Core principle: Iron farms are villager-behavior machines first and redstone builds second. If villager state is unstable, no block palette can save the farm.
Quick answer: best easy iron farm in 1.21
The best beginner-friendly survival farm is a compact elevated platform farm with:
- 3 villagers (Java) or 20 villagers (Bedrock minimum practical for stable output)
- One secure panic trigger (Java) or strict village center control (Bedrock)
- A 13x13 to 17x17 controlled spawn area (depending on version and design)
- Water-flush or slope funnel to a central kill chamber with lava blades
- Hoppers into chest storage and optional sorter
If this is your first farm, build the reliable starter first, then scale. Most players lose time by jumping directly to giant designs before validating mechanics in their own world seed and simulation distance.
Iron farm mechanics in plain English
Java Edition 1.21 mechanics (simplified)
- Villagers need to be able to work and maintain normal village behavior cycles.
- A panic trigger (usually a hostile sightline setup) creates a repeated golem-summon state.
- Golems attempt to spawn in valid blocks around the village cluster; invalid blocks force the spawn toward your platform.
- If nearby caves, roofs, or hills are valid spawn surfaces, rates drop immediately.
Bedrock Edition 1.21 mechanics (simplified)
- Village definition is stricter around bed/workstation ownership and villager count.
- Spawn logic depends heavily on village center and valid surface checks.
- Bed placement mistakes are one of the top causes of “zero golem” farms.
- Bedrock farms benefit from wider control zones and stricter spawn-proofing.
For both editions, your real enemy is not redstone: it is uncontrolled valid spawn blocks outside the intended area.
Pre-build checklist (do this before placing blocks)
1) Location
- Build at least 80+ blocks away from any other villager setup to avoid cross-linking.
- If near your base, place the farm high in the air to reduce cave spawn-proofing work.
- Avoid building directly above your breeder unless you understand vertical village interactions.
2) Materials
- Building blocks: ~8-12 stacks
- Slabs/trapdoors/buttons for spawn-proofing: 2-4 stacks
- Water buckets: 4-8
- Signs: 8-16
- Hoppers: 8-20
- Lava buckets: 2-4
- Beds: edition dependent
- Workstations (e.g., fletching table, composter): one per villager target
- Name tags (optional) for utility mobs if your design uses them
3) Villager logistics
- Move villagers first, then lock the cells before placing panic/activation components.
- Do not start with zombie transport if you are new; boat + rail is slower but safer and more consistent.
Java 1.21 starter iron farm: step-by-step
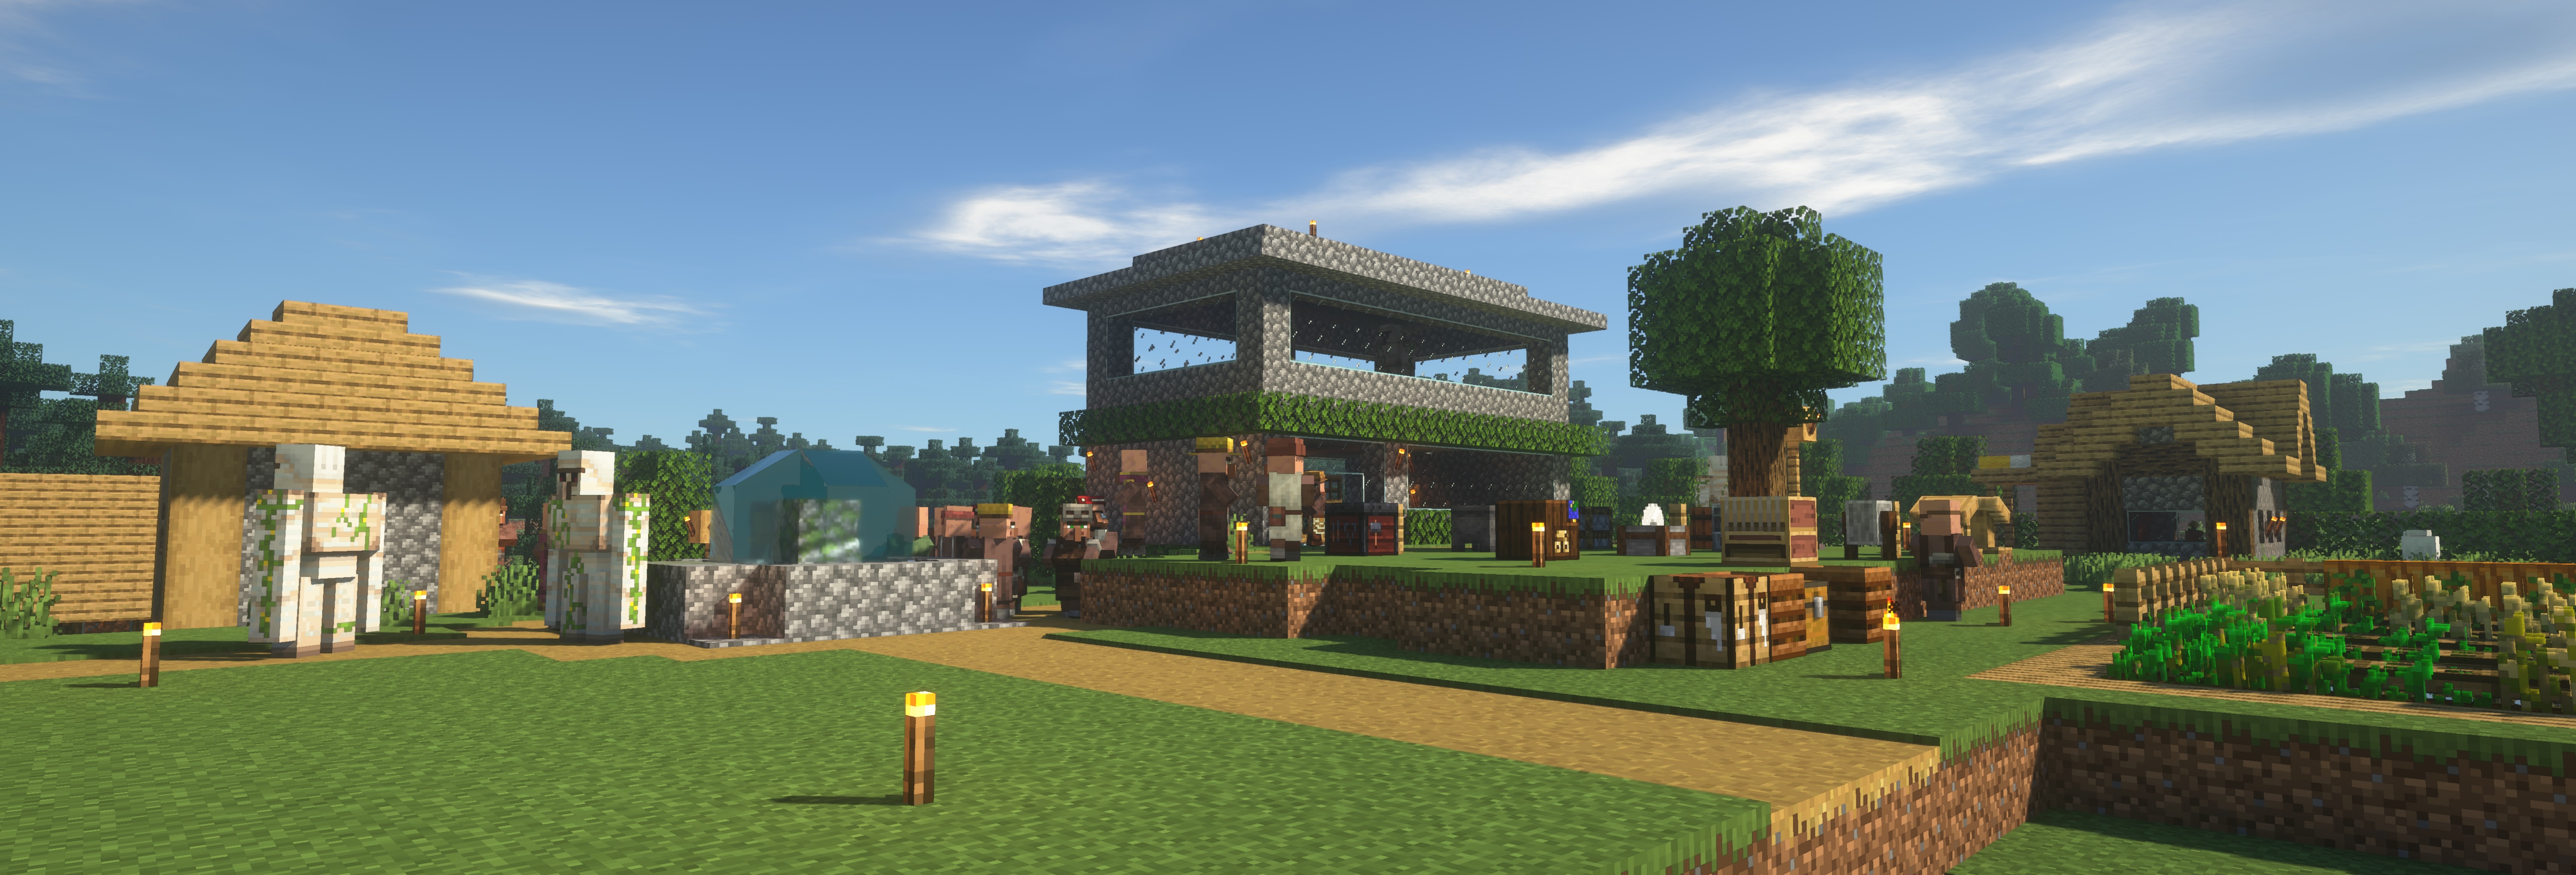
Step 1: Build the core frame
Create a 15x15 platform (or your design’s exact footprint) elevated well above terrain. Add a 3-block-high rim around the edge. This rim prevents accidental golem pathing and helps water channel control.
Step 2: Villager pods and line-of-sight control
Place 3 villager pods in a compact row with direct workstation access and controlled sightline windows toward the panic trigger zone. Keep pod spacing consistent so all villagers refresh schedules together.
Each pod should guarantee:
- No path escape
- Station ownership continuity
- Clean panic trigger visibility when active
Step 3: Spawn surface shaping
Create a central spawn deck using full blocks only where you want golems. Everything else should be invalid: slabs, buttons, trapdoors, or flowing water.
Think in binary terms: either “golem can spawn here” or “golem can never spawn here.” Gray area is where farms die over time.
Step 4: Water funnel and kill chamber
Use opposing water streams to push golems into a center trench. At trench head, install signs + lava blade kill point, with hoppers below into double chests.
If using lava, verify golem drops do not burn by testing with one spawn cycle and confirming iron ingot and poppy drops are collected consistently.
Step 5: Activation test
Run a 15-minute observation:
- Do villagers panic in cycles?
- Are golems spawning only on intended blocks?
- Any outside spawns on pod roofs, rails, walls, or nearby ledges?
If yes, patch now. Never “fix later” on farms that are already partially desynced.
Bedrock 1.21 starter iron farm: step-by-step
Bedrock players should prioritize village integrity over compactness. A slightly larger layout with cleaner bed/workstation assignment usually outperforms “micro” designs copied from Java.
Step 1: Build village platform + bed block
Create a flat controlled platform with enough room for villager housing, bed ownership, and spawn pad. Keep beds in a clean, countable cluster and avoid decorative extras until farm is stable.
Step 2: Villager count and workstations
Use a robust villager count (commonly 20 in practical designs for stable rates). Place equal workstation count and verify each villager can path-check to claim properly during work time.
Step 3: Spawn platform isolation
Build your target spawn deck and aggressively spawn-proof everything outside it: roofs, rails, pod tops, edges, and nearby scaffolding blocks.
Step 4: Collection chamber and storage
Use a simple center drop chute to kill chamber with hopper floor. Bedrock entities can behave differently with chunk boundaries, so keep chamber inside loaded area while testing.
Step 5: Full day/night validation
Let the farm run through multiple day cycles. If rates degrade after first session, check bed links, workstation access, and any accidental second village nearby.
Expected output and realistic benchmarks
Output varies by edition, simulation distance, uptime, and whether villagers stay in ideal behavior loops. Treat any “exact per hour” claim online as a test-lab number, not guaranteed survival output.
| Farm Stage | Java Practical Range | Bedrock Practical Range | Notes |
|---|---|---|---|
| Starter compact | 150-350 iron/hour | 90-220 iron/hour | Low complexity, high reliability |
| Optimized single module | 350-700 iron/hour | 220-450 iron/hour | Strict spawn-proofing required |
| Multi-module base farm | 700+ iron/hour | 450+ iron/hour | Advanced layout + chunk planning |
If your goal is practical survival progression, even a stable 200 iron/hour farm fundamentally changes your world economy: rails, hoppers, anvils, and tool replacement become easy.
Troubleshooting: why your iron farm stopped working
Issue 1: Zero spawns from the start
- Check villager count and workstation ownership
- Verify bed setup (especially Bedrock)
- Confirm panic/activation loop (especially Java)
- Confirm platform uses valid spawn blocks where intended
Issue 2: Works briefly, then drops hard
- Villagers may be desyncing from work cycles
- Pathfinding might be blocked intermittently
- A nearby village may have merged into farm logic
- Golems could be spawning in hidden cave shelves or roof surfaces
Issue 3: Golems spawn outside kill area
- Spawn-proof every surface within influence radius
- Replace decorative full blocks with slabs/trapdoors
- Re-check platform border and edge water flow coverage
Issue 4: Drops are burning
- Move hoppers one block lower and shield with signs
- Narrow lava contact strip to avoid item clipping through flames
- Test with controlled spawn and watch drop path in real time
Integrating iron farms into your survival progression
Once your farm is stable, tie it into the rest of your world economy:
- Feed iron to a crafting calculator workflow for bulk rail/hopper projects
- Route overflow into shulker boxing if you run storage-heavy bases
- Use extra iron for villager trading loops (lanterns, tools, armor progression)
- Pair with a villager trading strategy for emerald acceleration
Related high-value pages in this site architecture:
Advanced upgrade path (after starter farm)
Upgrade 1: Better collection throughput
Increase hopper lanes and buffer chests before adding more villagers. Storage bottlenecks silently waste output during long AFK sessions.
Upgrade 2: Module duplication with spacing rules
Duplicate modules only when village and spawn influence ranges are fully understood for your edition. Incorrect spacing often gives lower output than a single optimized module.
Upgrade 3: Chunk and simulation planning
Place modules in always-loaded areas you naturally use, or design around your AFK spot. “Theoretical max output” means nothing if farms unload while you play elsewhere.
FAQ: high-intent iron farm questions
What is the best Y level to build an iron farm in Minecraft?
Height is less important than spawn-proof control. Elevated builds are easier because they reduce external valid spawn surfaces and cave interference.
Do iron farms work in Minecraft 1.21 without zombies?
Yes in many designs, especially Bedrock-oriented village mechanics. In Java, panic-based designs often use hostile sightline for high consistency, but alternative approaches exist with lower peak rates.
Why is my iron farm spawning cats but no golems?
This usually indicates your village state exists but golem spawn requirements are not fully satisfied or valid spawn surfaces are misconfigured. Recheck villager-workstation cycle and spawn platform validity.
How far should an iron farm be from my villager breeder?
Use strong separation (commonly 80+ blocks or edition-specific safe distances) to prevent village merge behavior and ownership conflicts.
Is Java or Bedrock iron farming easier?
Java offers strong high-rate designs with panic loops; Bedrock rewards disciplined village setup and spacing. Neither is “harder” overall if you follow edition-specific rules from the start.
Field-tested build discipline (E-E-A-T mindset for survival players)
To keep this guide practical and trustworthy, run your farm checks as if you are debugging a system:
- Test one variable at a time (beds, then workstations, then spawn-proofing)
- Log 15-minute output windows before and after each change
- Avoid “full rebuild panic” until you isolate the exact failure mode
- Keep screenshots of villager pod states to compare desync patterns
This approach saves hours and gives you reproducible results across world updates.
Final takeaway
If your goal is to rank up your survival world quickly, an iron farm is one of the highest ROI projects in Minecraft 1.21. Build the reliable starter first, enforce strict spawn-proofing, validate villager behavior cycles, and scale only after your baseline is stable.
Need the next guide in this cluster? Continue with:
Once this first piece is live, I can publish the next long-tail article in the same topical cluster so your guides section compounds authority instead of scattering keywords.
Tags
Related Guides
More guides you might enjoy

How to Find Diamonds in Minecraft 2026: Best Methods & Y-Level
Find diamonds quickly in 2026 with our updated guide. Best Y-levels, mining methods, and tips for maximizing your diamond haul.

Complete Enchanting Guide 2026: All Enchantments Explained
Everything you need to know about enchanting in Minecraft 2026. Full enchantment list, best combos, and XP farming tips.

Villager Trading Guide 2026: All Trades & Best Deals
Everything about villager trading in 2026. All professions, best emerald trades, and how to get every enchanted book.
Complete Nether Portal Guide: Building, Linking, and Traveling
Master Nether Portals with this complete guide. Learn to build, link, and navigate between dimensions efficiently.