Minecraft Villager Trading Hall 1.21 Guide: Best Layout, Price Resets, and Zombie Curing ROI

Minecraft Villager Trading Hall 1.21 Guide: Best Layout, Price Resets, and Zombie Curing ROI
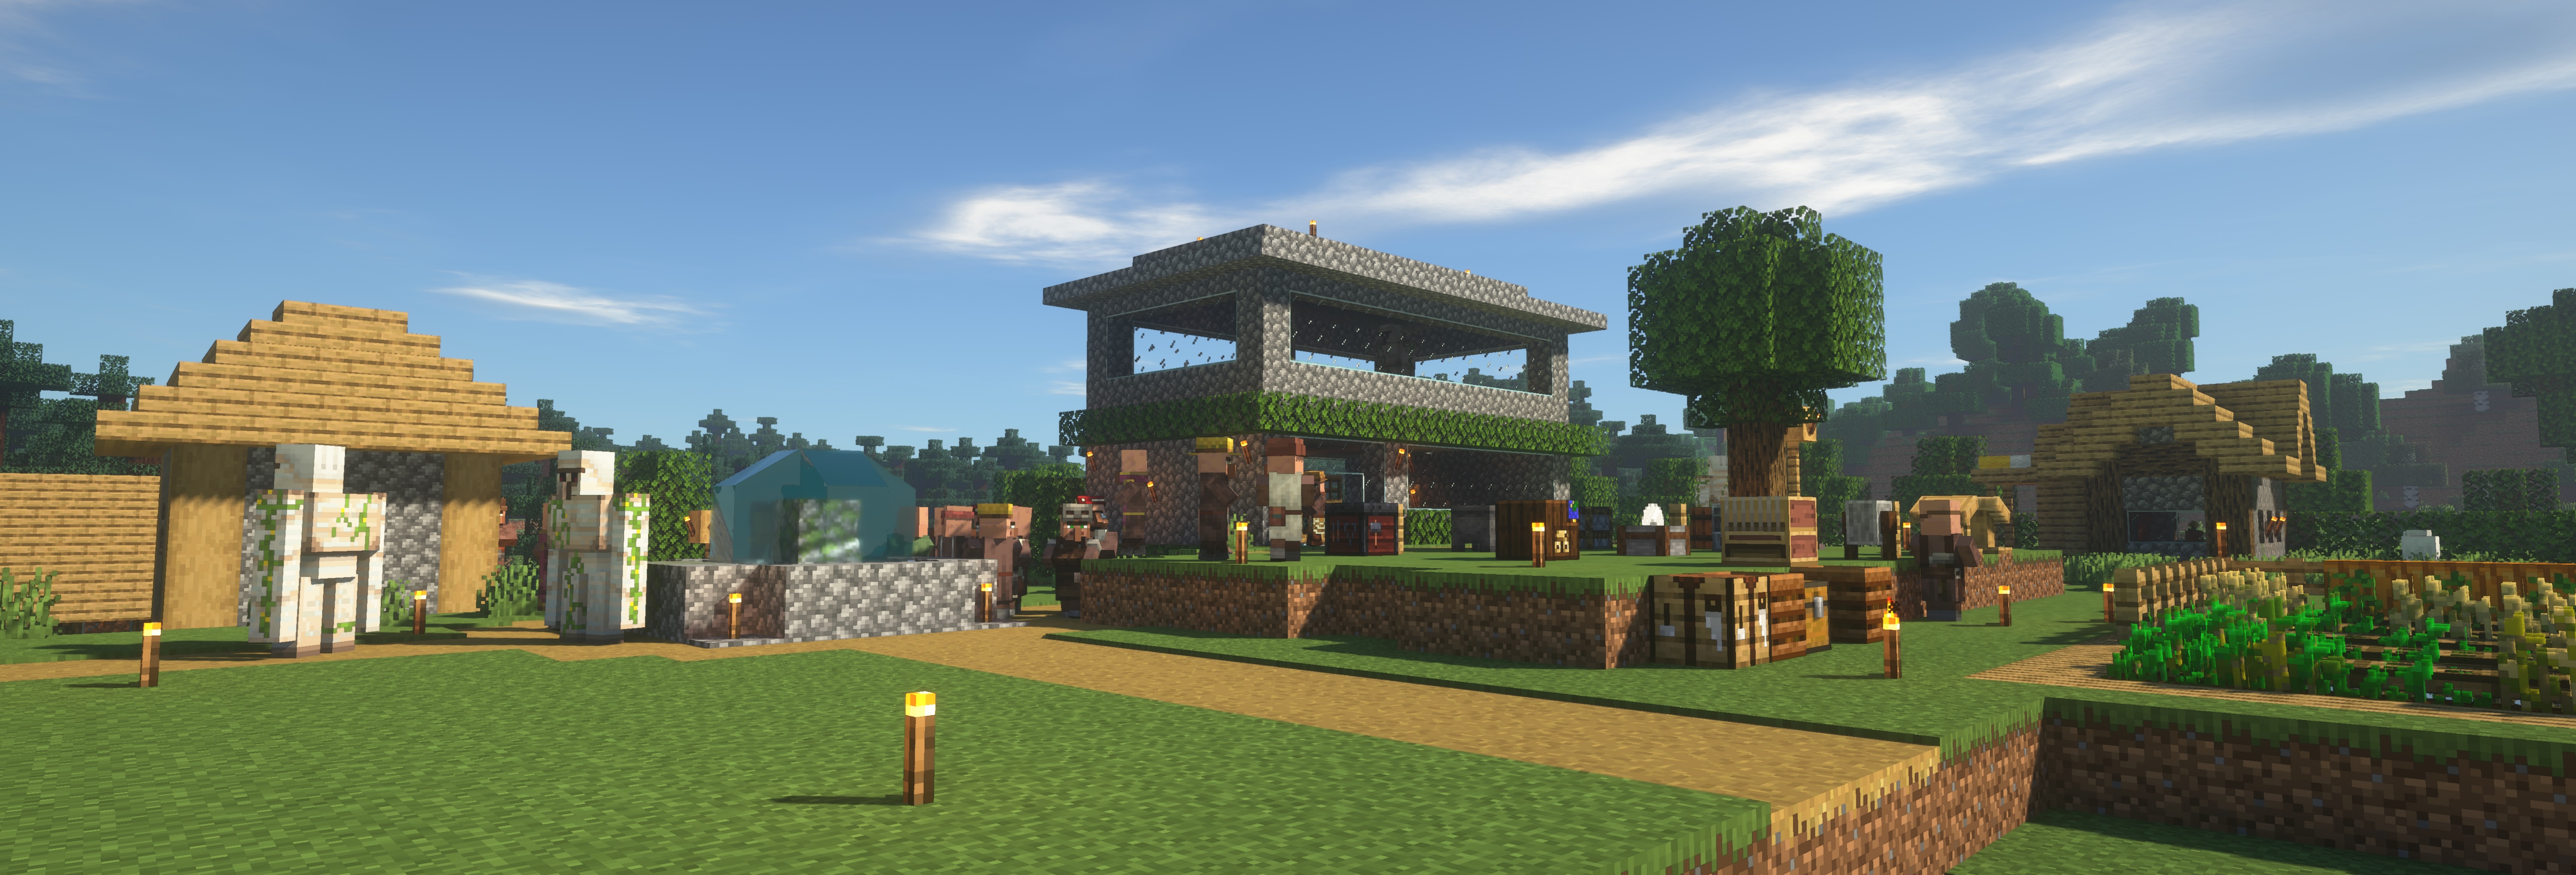
A scalable villager trading hall blueprint with profession routing, reroll strategy, and emerald efficiency.
April 1, 2026
Why this guide exists
If you searched for minecraft villager trading hall 1.21 best layout, you are probably trying to skip trial-and-error and get a setup that works in real survival worlds, not just a showcase build. This guide is written for practical results in Minecraft 1.21.4, with specific decision points, realistic material paths, and troubleshooting that addresses what players actually Google when something breaks.
Unlike thin guides that only list recipes or give a short checklist, this article walks through planning, build order, optimization, and common failure modes. You can follow it top to bottom, or jump to the sections you need when debugging your world.
Search intent map (what players ask)
These are the long-tail intent clusters this guide directly answers:
- how to make a villager trading hall in minecraft 1.21
- best villager professions for emeralds in minecraft
- how to reset villager trades without breaking hall
- zombie curing discount guide minecraft java
- minecraft librarian mending setup step by step
Planning phase: before you place blocks
Start by deciding your target economy: books, tools, blocks, or raid support. Build profession lanes around output goals rather than random villager assortment.
At this phase, your goal is to remove variance. Most Minecraft systems fail because players improvise layout changes without understanding hidden dependencies (mob rules, villager schedules, spawn checks, pathing checks, or inventory throughput). Lock your plan first, then build.
Build path: step-by-step execution
Establish secure cells, lock workstation ownership, then add pathing and cure-safe zones. Build in profession phases so mistakes stay isolated and reversible.
Build in layers and validate each layer before moving on. In practical terms that means: confirm core mechanic, then containment, then collection, then expansion. If you skip verification and decorate too early, root-cause analysis becomes expensive.
Internal item links you should use during this build
The following items are directly involved in progression for this guide topic. Use these links while building so you can quickly verify sourcing, recipes, and alternatives:
- Emerald - Main trading currency and progression metric.
- Lectern - Librarian profession assignment and reroll control.
- Composter - Farmer setup for high-volume emerald loops.
- Golden Apple - Required for curing workflow and discount optimization.
- Splash Potion of Weakness - Core curing trigger for villager conversion.
- Name Tag - Utility for permanent entity management in complex halls.
Optimization that actually increases output
Prioritize high-frequency profit trades, controlled reroll cadence, and transport speed between modules. Measure emerald-per-minute for each lane before scaling.
Optimization should be measured, not guessed. Test with fixed windows (15-30 minutes) and compare baseline vs modified output. Keep one variable changed per test. This alone can save hours and prevents false positives from random simulation differences.
Most common mistakes and how to fix them fast
Big failures include workstation stealing, accidental unlinking during night cycles, and overstuffed halls with no maintenance paths.
- Symptom: Works for a short time, then degrades. Fix: verify state synchronization and external interference zones.
- Symptom: Low output despite correct structure. Fix: check entity handling bottlenecks and collection chain saturation.
- Symptom: Great rates in test world, weak rates in survival. Fix: account for chunk loading, travel patterns, and real play behavior.
Progression: what to do after this guide
After core hall stability, integrate with your iron/raid/farm loops and automate material feeds for repeatable emerald generation.
From an SEO and gameplay perspective, the best next move is topical clustering: solve one high-intent problem, then chain into the next practical bottleneck. That creates a better player experience and stronger organic relevance for your guides section.
FAQ
Can I still reset librarian trades in 1.21?
Yes, but only before locking the first trade. Keep workstation ownership controlled during rerolls.
Which villager profession is best for early emeralds?
Farmers are usually best for early consistency because crop loops scale quickly.
Do zombie cure discounts stack forever?
Discount behavior depends on edition/version rules and reputation mechanics, so treat curing as optimization, not a permanent exploit.
Final checklist
- Core system runs reliably for a full play session.
- Collection and storage are stable under sustained output.
- All required item dependencies are linked and verified.
- No unresolved edge-case issues remain in your world conditions.
If you want the next batch, we can publish a second cluster around late-game automation and server-safe versions of these systems.
Tags
Related Guides
More guides you might enjoy

How to Find Diamonds in Minecraft 2026: Best Methods & Y-Level
Find diamonds quickly in 2026 with our updated guide. Best Y-levels, mining methods, and tips for maximizing your diamond haul.

Complete Enchanting Guide 2026: All Enchantments Explained
Everything you need to know about enchanting in Minecraft 2026. Full enchantment list, best combos, and XP farming tips.

Villager Trading Guide 2026: All Trades & Best Deals
Everything about villager trading in 2026. All professions, best emerald trades, and how to get every enchanted book.
Complete Nether Portal Guide: Building, Linking, and Traveling
Master Nether Portals with this complete guide. Learn to build, link, and navigate between dimensions efficiently.