
PluginLicenseRef-All-Rights-Reserved
PipelessPipes
A simple pipesystem without the hassle of laying pipes
40
Downloads
0
Followers
10 months ago
Updated
📦
1
Versions
📖About PipelessPipes
PipelessPipes
A simple but powerful item transportation system for your server.
Are you tired of laying endless meters of pipes? Then this is the solution for you!
PipelessPipes is a lightweight plugin that lets you connect containers directly and transfer items from one to another. It supports filtering of items with a whitelist or blacklist to make item management easier and faster. Also you can add an unlimited number of items to your filter.
💡 Features
- 🚀 Instant container-to-container item transfer
- ⚙️ Customizable filters
- ✅ Whitelists & ❌ Blacklists for easy control
- ⚡ Quick and simple setup
- ✒️ No long commands required
- 🌍 Supports English and German (players can choose their own language)
- 📝 Fully customizable: pipewrench texture, messages, and GUI text
❓ How to use
- First, you need a Pipewrench. Get one with:
/pipe givePipeTool - Click on any container (e.g., chest, double chest, barrel, furnace, dispenser, dropper, etc.).
- (Optional) If you or a player want to change the displayed language (only for themselves) they can do that with
/pipe setLanguage <deutsch|englisch>
Define container
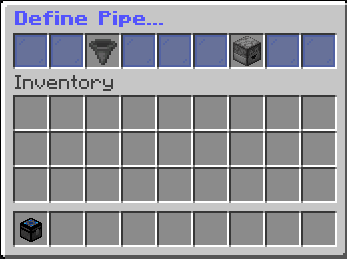
After clicking, a GUI will open with two options:
- Define as Input
- Define as Output
Input Pipe
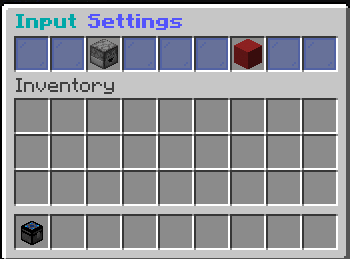
If you set a container as Input, the GUI lets you:
- Change it to an Output node
- Remove it from the network
Output Pipe
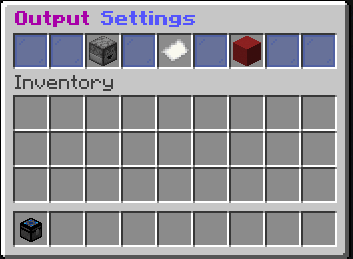
If you set a container as Output, the GUI lets you:
- Change it to an Input node
- Remove it from the network
- Manage filters
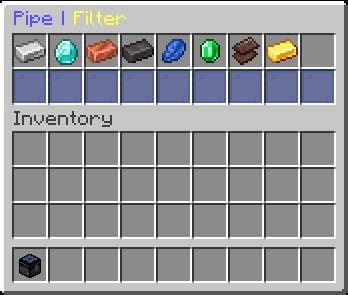
Filters
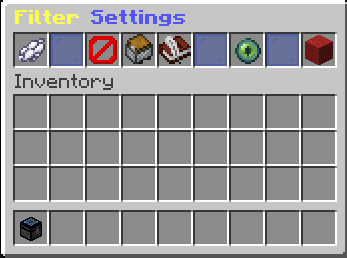
When you open the filter GUI, you’ll see:
- White-/Black Dye → Switch between whitelist (default) and blacklist
- Barrier / Item in offhand → Add the item in your offhand to the filter
- Chest minecart → Add all items from the container to the filter
- Book → Add items manually via chat command:
/pipe addFilterItem [Item](Replace [Item] with the actual item) - Red Wool → Reset the filter
- Ender Eye → View the full filter. There you can click on an item to remove it from the filter.

📄 Permissions
| Permission | Default | Description |
|---|---|---|
pipelesspipes.command.pipe |
true | Use the /pipe command |
pipelesspipes.command.language |
true | Set the displayed language |
pipelesspipes.command.pipe.addFilterItem |
true | Add a filter item via command |
pipelesspipes.command.pipe.admin |
false (op) | Get a Pipewrench |