
Map Tools
Essential utilities for creating maps or building. Create smooth animations, realistic message printing, resource pack management, block display tools, danger command checker, position saver and much more
📖About Map Tools
Map Tools
Map Tools helps you to create various things in Minecraft Maps. All features are seperated modules, that can be toggled off/on at anytime.
Everything created with Map Tools will work 100% vanilla without any plugins installed.
Map Tools saves you countles hours of work if you...
- ...work with display entites like blocks to create details or animations
- ...need smooth camera paths, transitions or entity animations (datapack)
- ...need custom npc/entity pathing, e.g. for adventure maps (datapack)
- ...want fancy styled or even animated messages or titles (datapack & resource pack for nametags)
- ...quick load and constantly change resource packs
- ...and more!
Watch the video to see everything! (Or scroll down to read about every module in detail)
Coming Soon - I hate cutting...
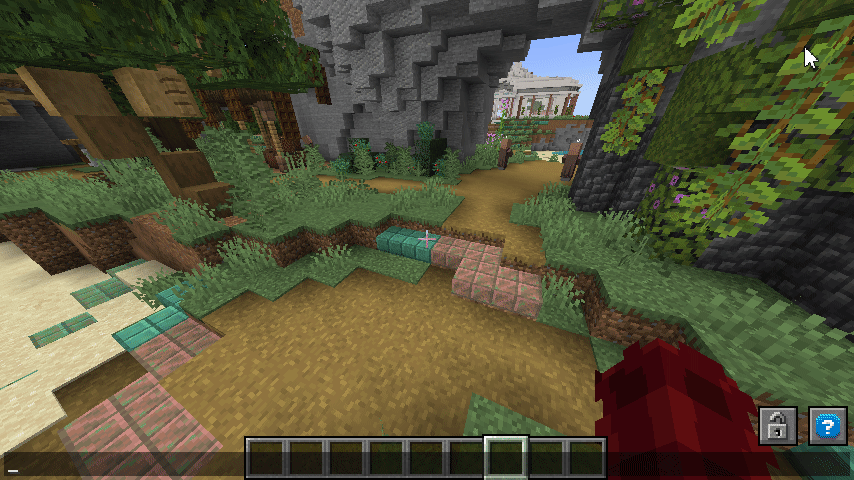
(meanwhile enjoy this gif)
🧩 Module Breakdown
Every module can be toggled on or off via /maptools module <module> <enable/disable>. If toggled off all interactions and commands instantly disappear but already saved creations will still work.
A few modules are only useable if you supported me on KoFi. If you think Map Tools saved you some hours of work worth a coffe, i would appreciate any support ❤️
All Modules - Click to unwrap Smooth Animations Create smooth animations for entities any type. This can be used for camera paths (i highly recommend to animate an armorstand and force the player to spectate it, this highly increase the animation smoothness) but also for detailed display animations. You can set it up to auto loop.NOTE - After printing, the animation can be used/played without the plugin via datapack
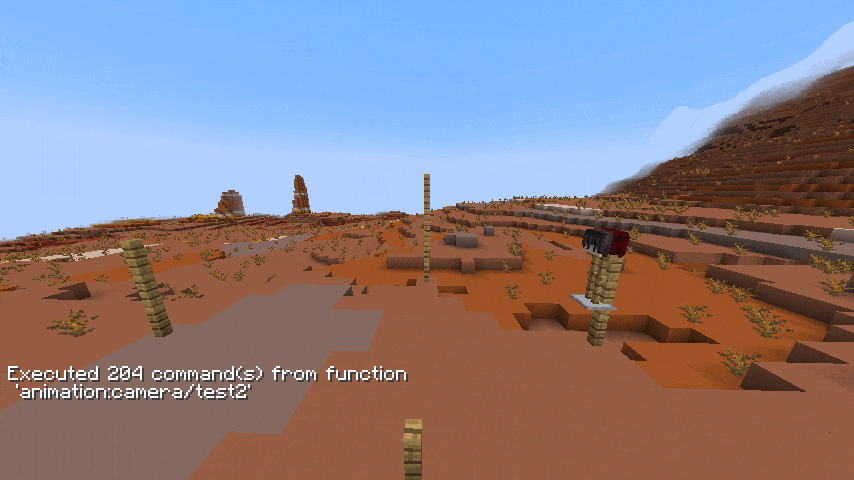
Guide
Start with entering /animation new to begin a new setup. Now you can add as many new control points as you want to manipulate the animation with /animation add. The added point is your current location and you need at least 3 to create proper interpolation. Remove unwanted positions with /animation remove-last. To complete or test your animation render it with /animation render <loop> <ticks> <target> (loop:true will connect the last point with the first, ticks is the animation time between each point and target a given selector). After rendering you can either continue modifying your animation or print it to a usable datapack function via /animation print <target> <name> (name represents the function name, use " " for nested paths e.g. "camera/island/front"
Guide
Use /block-update toggle to turn any updating on block placing/breaking.
Guide
Take an item in your hand and enter /commandtool command <command> to apply any command to it. Use /commandtool clear to remove it again
Guide
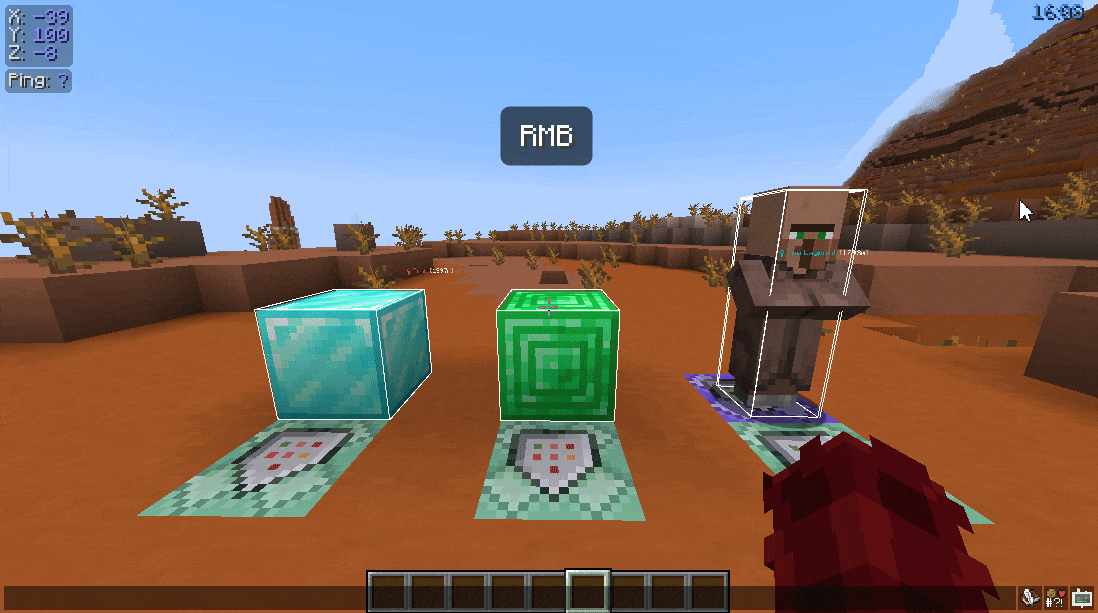
To convert a single block use /blockify <position> <tag> <scale> [origin] (tag will be applied as tag to the created entity, scale is the final scale of the block where 1 is default, origin is the source location -> useful multi-block structures that should rotate). For easier use get the tool with /blockify-tool <scale> <tag> [origin] and click on any blocks to convert them
Guide
To wrap an interaction hitbox around any entity or block enter /interaction spawn <target> [tag] [space] (target can be a block or selector, tag will be applied as tag to the interaction, space is the extra amount of size relativ to the source hitbox size in blocks). For easier use get the tool with /interaction tool <tag> and click on any block or entity

Guide
Take a leash in your hand and click on any fence (not walls, use block entities for them). Now click on another fence without the leash in hand to connect them. Otherwise use /leash <from> <to> to connect two fences
Guide
To get the marker tool enter /marker-tool <tag> (tag will be applied as tag to the marker entity). Now you can right click any blocks to add the marker and left click to remove it again. Markers do not have any hitbox so to find them again you can use /marker-finder <range> (range in blocks) to highlight all around you with green particles"

Guide
The multi tool is very complex and you might need some time to get used to it. Get one with /multitool get <entity> <radius> <vector> (entity only targets entities by your selection, radius is the amount in blocks the beam search for entities, vector is the amount in blocks/degrees your selection will be moved/rotated). You find all hotkeys in the tool description. To switch between move and rotate mode enter /multitool mode <move/rotate> or move/rotate your selection directly with /multitool rotate-by/move-by <vector> or change the beam range with /multitool range
Guide
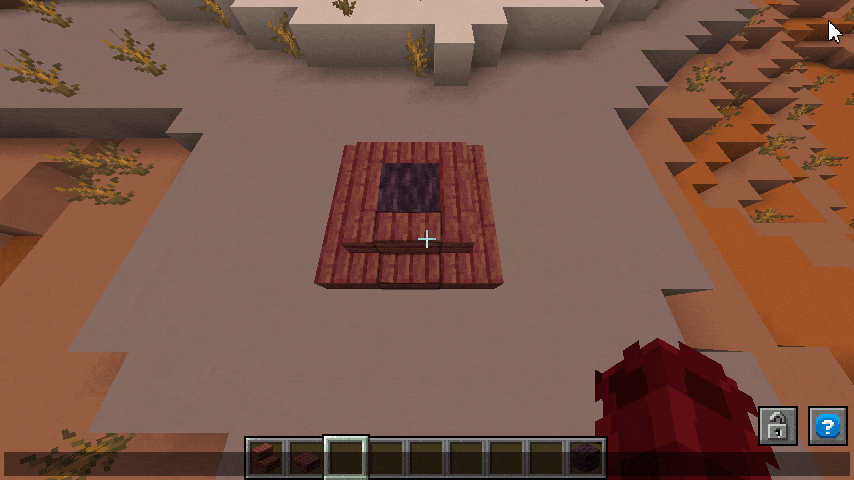
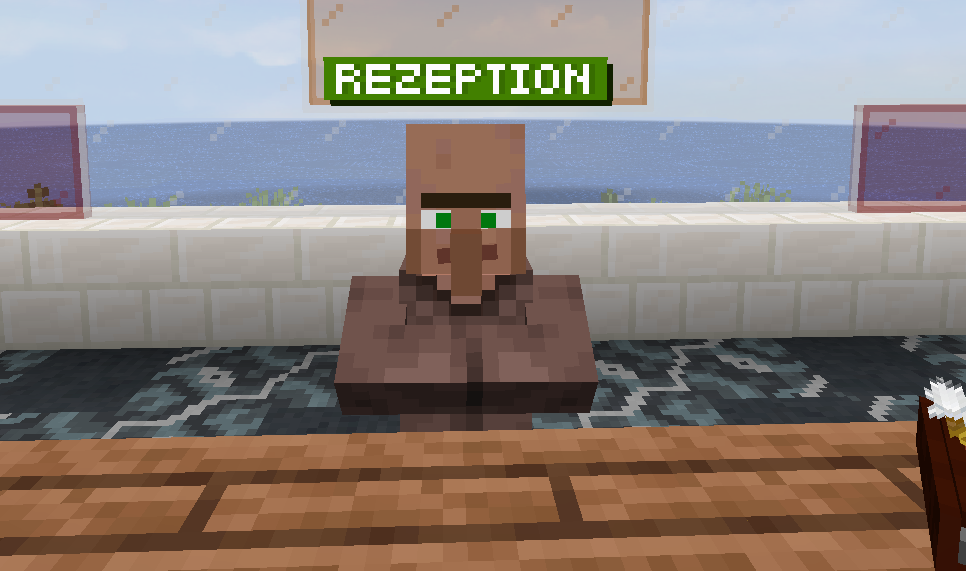
To create those custom name tags simply enter /nametag <text> <main> <shadow> <char-shadow> [char] (text must be alphanumeric with a few extras like #-.,:;?!). All arguments (except text) are hex colors that support transparency. For example #ffffff represents white and #ffffff7f represents white with 7f (~50%) transparency. After generating the new image it will be added to the defined resource pack with a new generated char that you can copy from chat. You NEED to reload your pack from the server to see it!
Guide
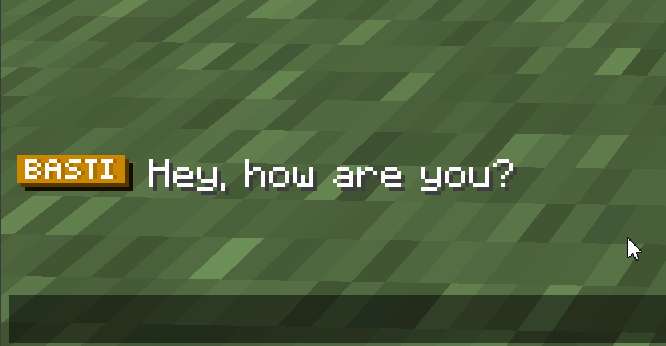
To create a single animated message enter /message new <prefix> <message> <target> <name> (prefix always visible, message will be animated - use ① ⑤ ⑳ symbols for pauses, name is the function name - use " " for paths). All pause symbols can be copied from /message symbols. To parse a conversation json use /message conversation <path> (path of the conv.json starting by the function folder). The required syntax is as follows:
{
    "target": "@a",
    "content": [
        {
            "prefix": "<red>Miraculixx</red>: ",
            "text": "Hey,⑤ what's up?"
        },
        {
            "prefix": "<yellow><b>You</b></yellow>: ",
            "text": "Nothing really,⑤ just reading those docs..."
        }
    ]
}
⠀
Pathing is our most powerful tool for creating custom animations or pathing finding. From a simple order of a few commands that will be executed each one tick delayed to custom entity movement only your imagination is limiting here.
You can add the following things to your script: command (simply executing given command as the script target), delay (wait x ticks before continuing), repeat (similar as command but repeating x times on tick delayed each), position (moves the script target from start position to entered position with x speed. Plays walk animation if touching ground & not too fast).
Guide
To start a new pathing script enter /pathing new <target>. Now you can add anything to the script e.g. /pathing add-position <position> <speed> (speed in blocks per second), /pathing add-command <command>, /pathing add-delay <delay> (delay in ticks). To remove unwanted enter /pathing remove-last. Now you can either play the pathing with /pathing play (start position might not be accurate) or print it to datapack with /pathing print <name> (name is the function path). Along with the function, a json config with the same name will be created so you can modify and reprint the script at anytime with /pathing reprint <name>. Ofcourse you can only create those json files instead of using ingame commands with following syntax:
{
    "target": "@e[tag=test]",
    "actions": [
        {
            "type": "REPEAT",
            "time": 100.0,
            "script": "particle minecraft:cloud ~ ~-0.2 ~ 0 0 0 0.04 3"
        },
        {
            "type": "CONTROL_POINT",
            "location": "{\"world\":\"world\",\"x\":4.5,\"y\":139.5,\"z\":-8.1,\"yaw\":10.0,\"pitch\":35.5}",
            "time": 0.1
        },
        {
            "type": "DELAY",
            "time": 20.0
        },
        {
            "type": "RUN_SCRIPT",
            "script": "say test finished"
        }
    ]
}
Guide
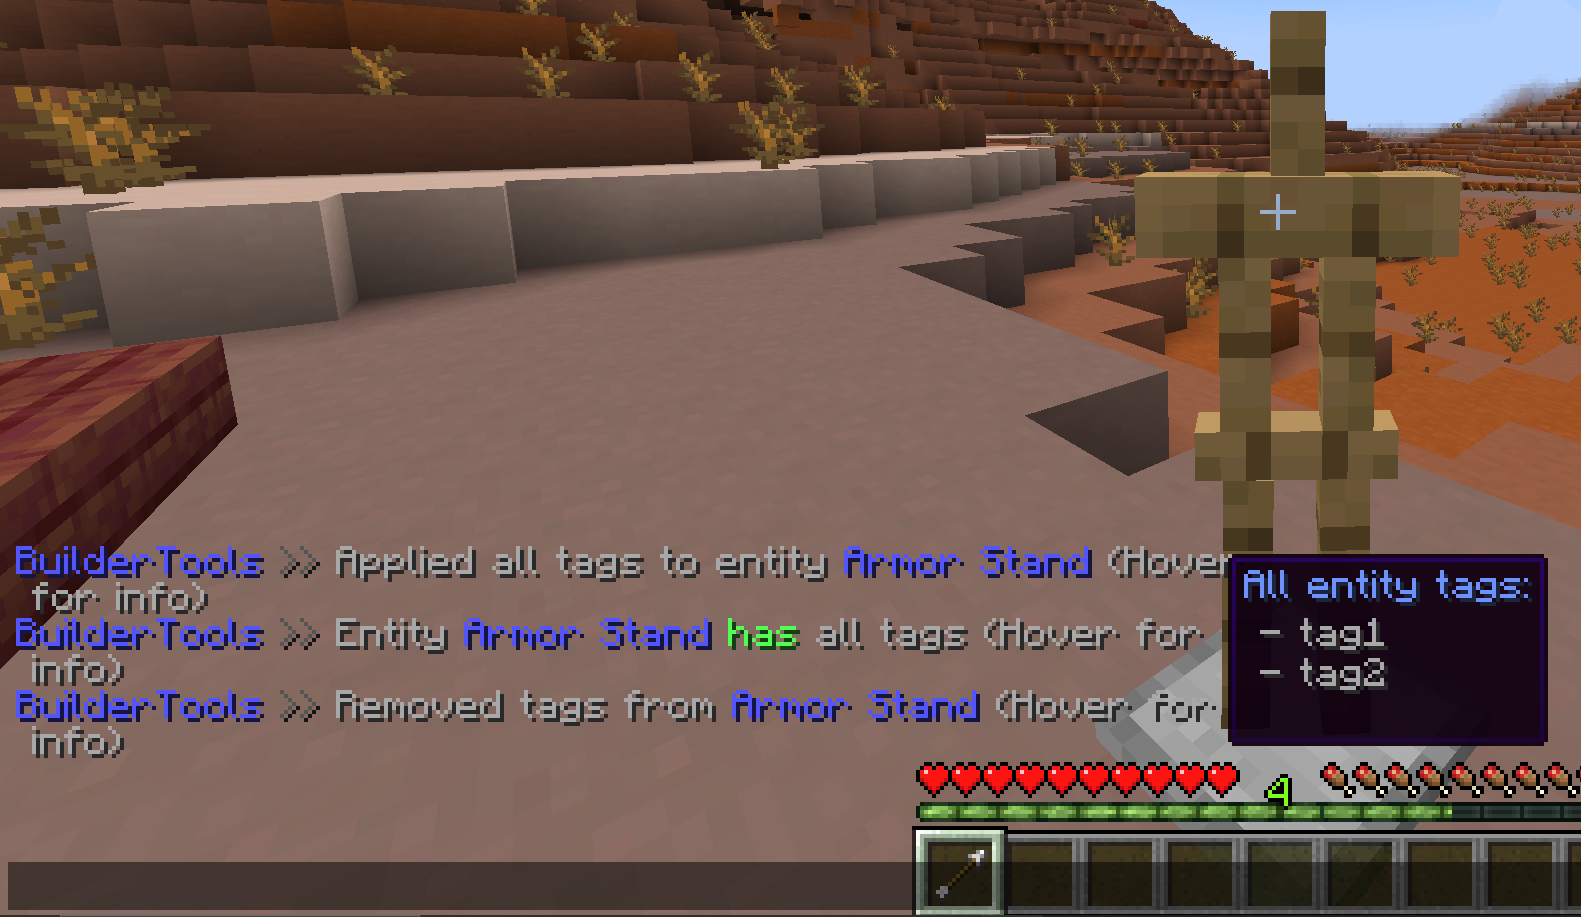
To get a tag tool enter /tag-tool <tags> [entity-type] [radius] (tags are all tags that will be added/removed/checked - use "tag1 tag2 tag3" for multiple tags, optional entity-type to filter targets, radius is the selection radius in blocks for entities without hitboxes). All keybinds are visible by hovering over the tool item.
Guide
Requires MWeb. The main pack folder and groups can be configured inside the settings.yml. If you defined texturepack as your main folder, you can put any resource packs inside this folder (unziped). Folders starting with a . will be excluded and folders named like a group will only be loaded if the group is requested. Manually request RPs by /resourcepack <group> and auto request on joining by /tag @s add <group>. Example folder structure for settings texturepack-folder: "texturepack" and texturepack-groups: ["guis","optifine-entities"]:
Server Folder
|- texturepack
   |- .test-icons   //will be excluded
   |- blocks   //always loads
   |- guis   //only loads on requesting guis
   |- optifine-entities //only loads on requesting optifine-entities
Where each folder needs classic resource pack structure:
blocks
|- pack.mcmeta  //ONLY needed ONCE
|- assets
   |- minecraft
      |- <content>
Guide
To save a new position enter /pos new <name> and to teleport enter /pos tp <name>. You can also delete one or all (reset) saved positions.
⠀
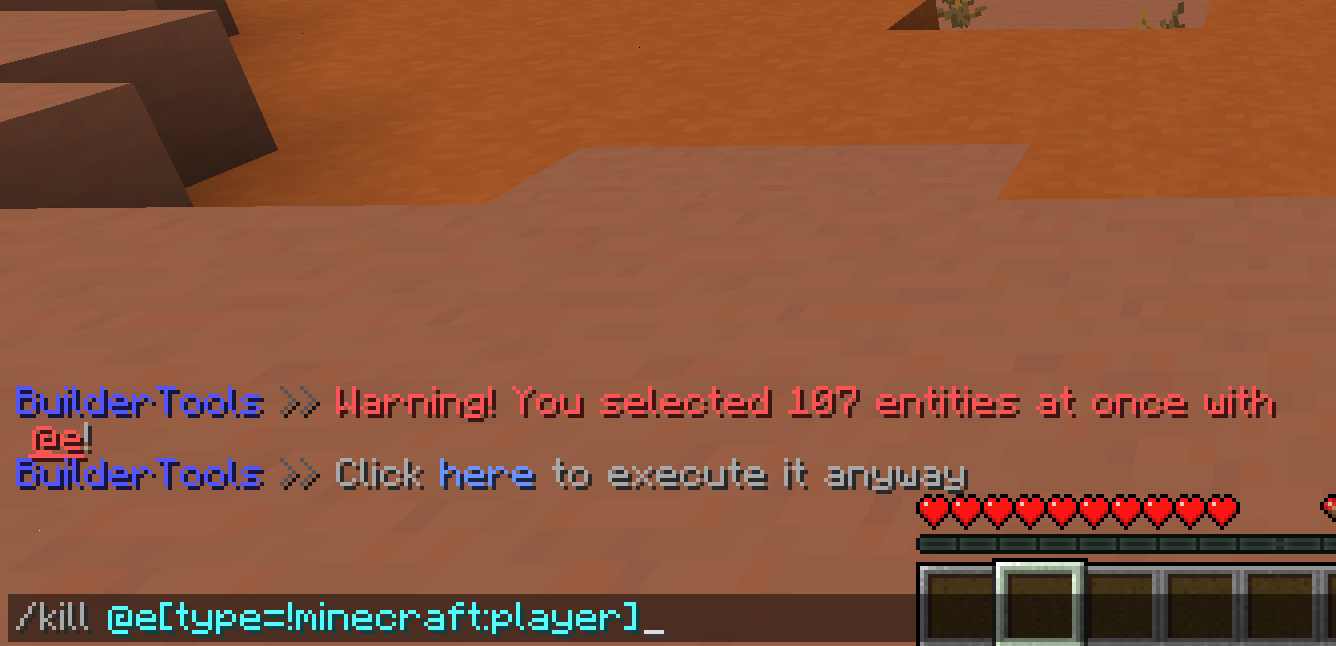
Creating specific entities and displays can take a lot time but deleting them forever takes only one command... MapTools scans all your entered commands and check how many entities will be modified by it (searches for selectors like @e[...]). If more then a configured amount (default 10) entities will be modified by a command, it will not be executed and you receive a warning. Still want to enter it? Confirm it by either hitting here in chat or execute it twice in row. /kill @e is blocked completely. (I wish someone had made this before me...)
Guide
Nothing for you to do here. Still, be careful what you enter. MapTools only checks vanilla styled commands. Some plugins tend to use a legacy command system or their own styling that may not be recognized by MapTools.
Text Styler - MiniMessage Use easy MiniMessage text styling everywhere! Well, at least in Anvils and Signs, if you have ideas where it would be also useful just let me know!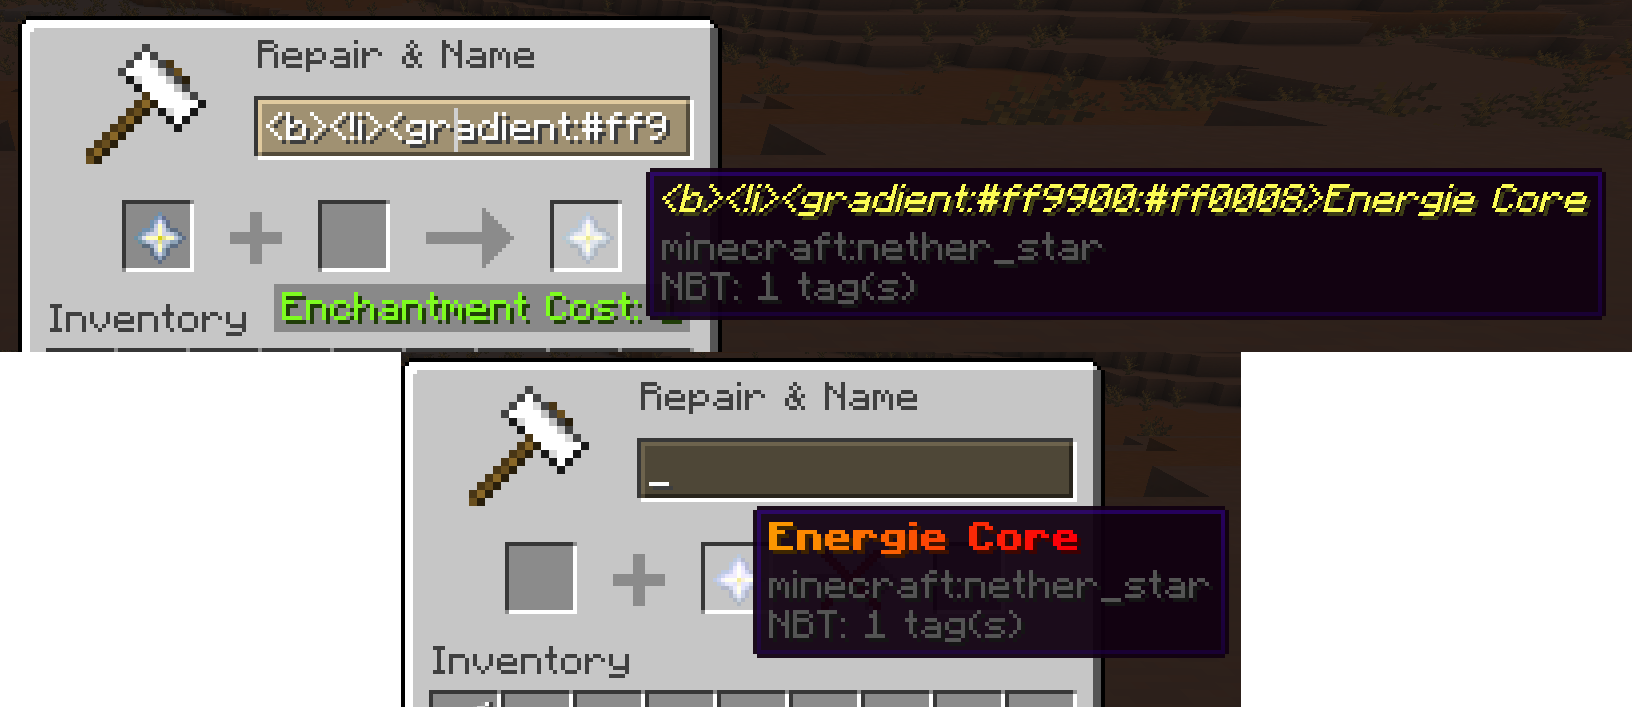
Guide
If you are not familiar with MiniMessage, it's an insane easy to use format to write text using all features text has to offer (like colors, translations, gradients, scores, ...). Read the docs here
Core Features - Click to unwrapThere are some core features that cannot be toggled off. The most useful feature is the /reload-dp command to only reload datapacks and not the entire server. Using 1.20.2 highly speeds up this process.
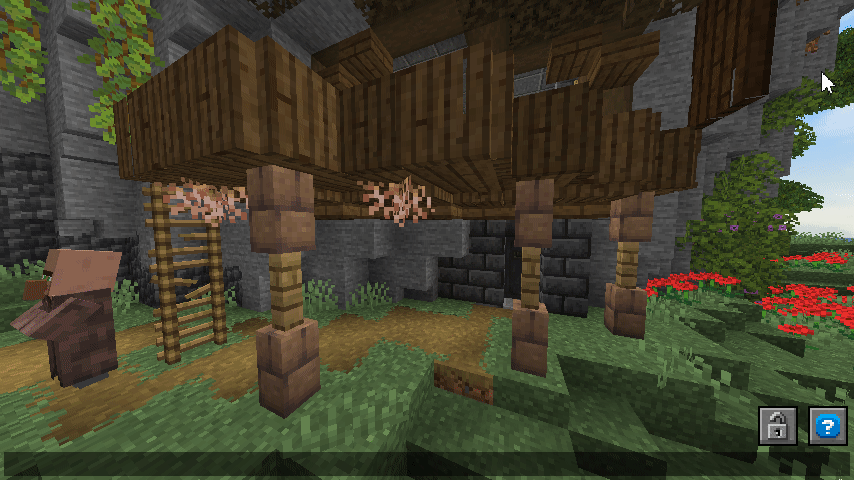
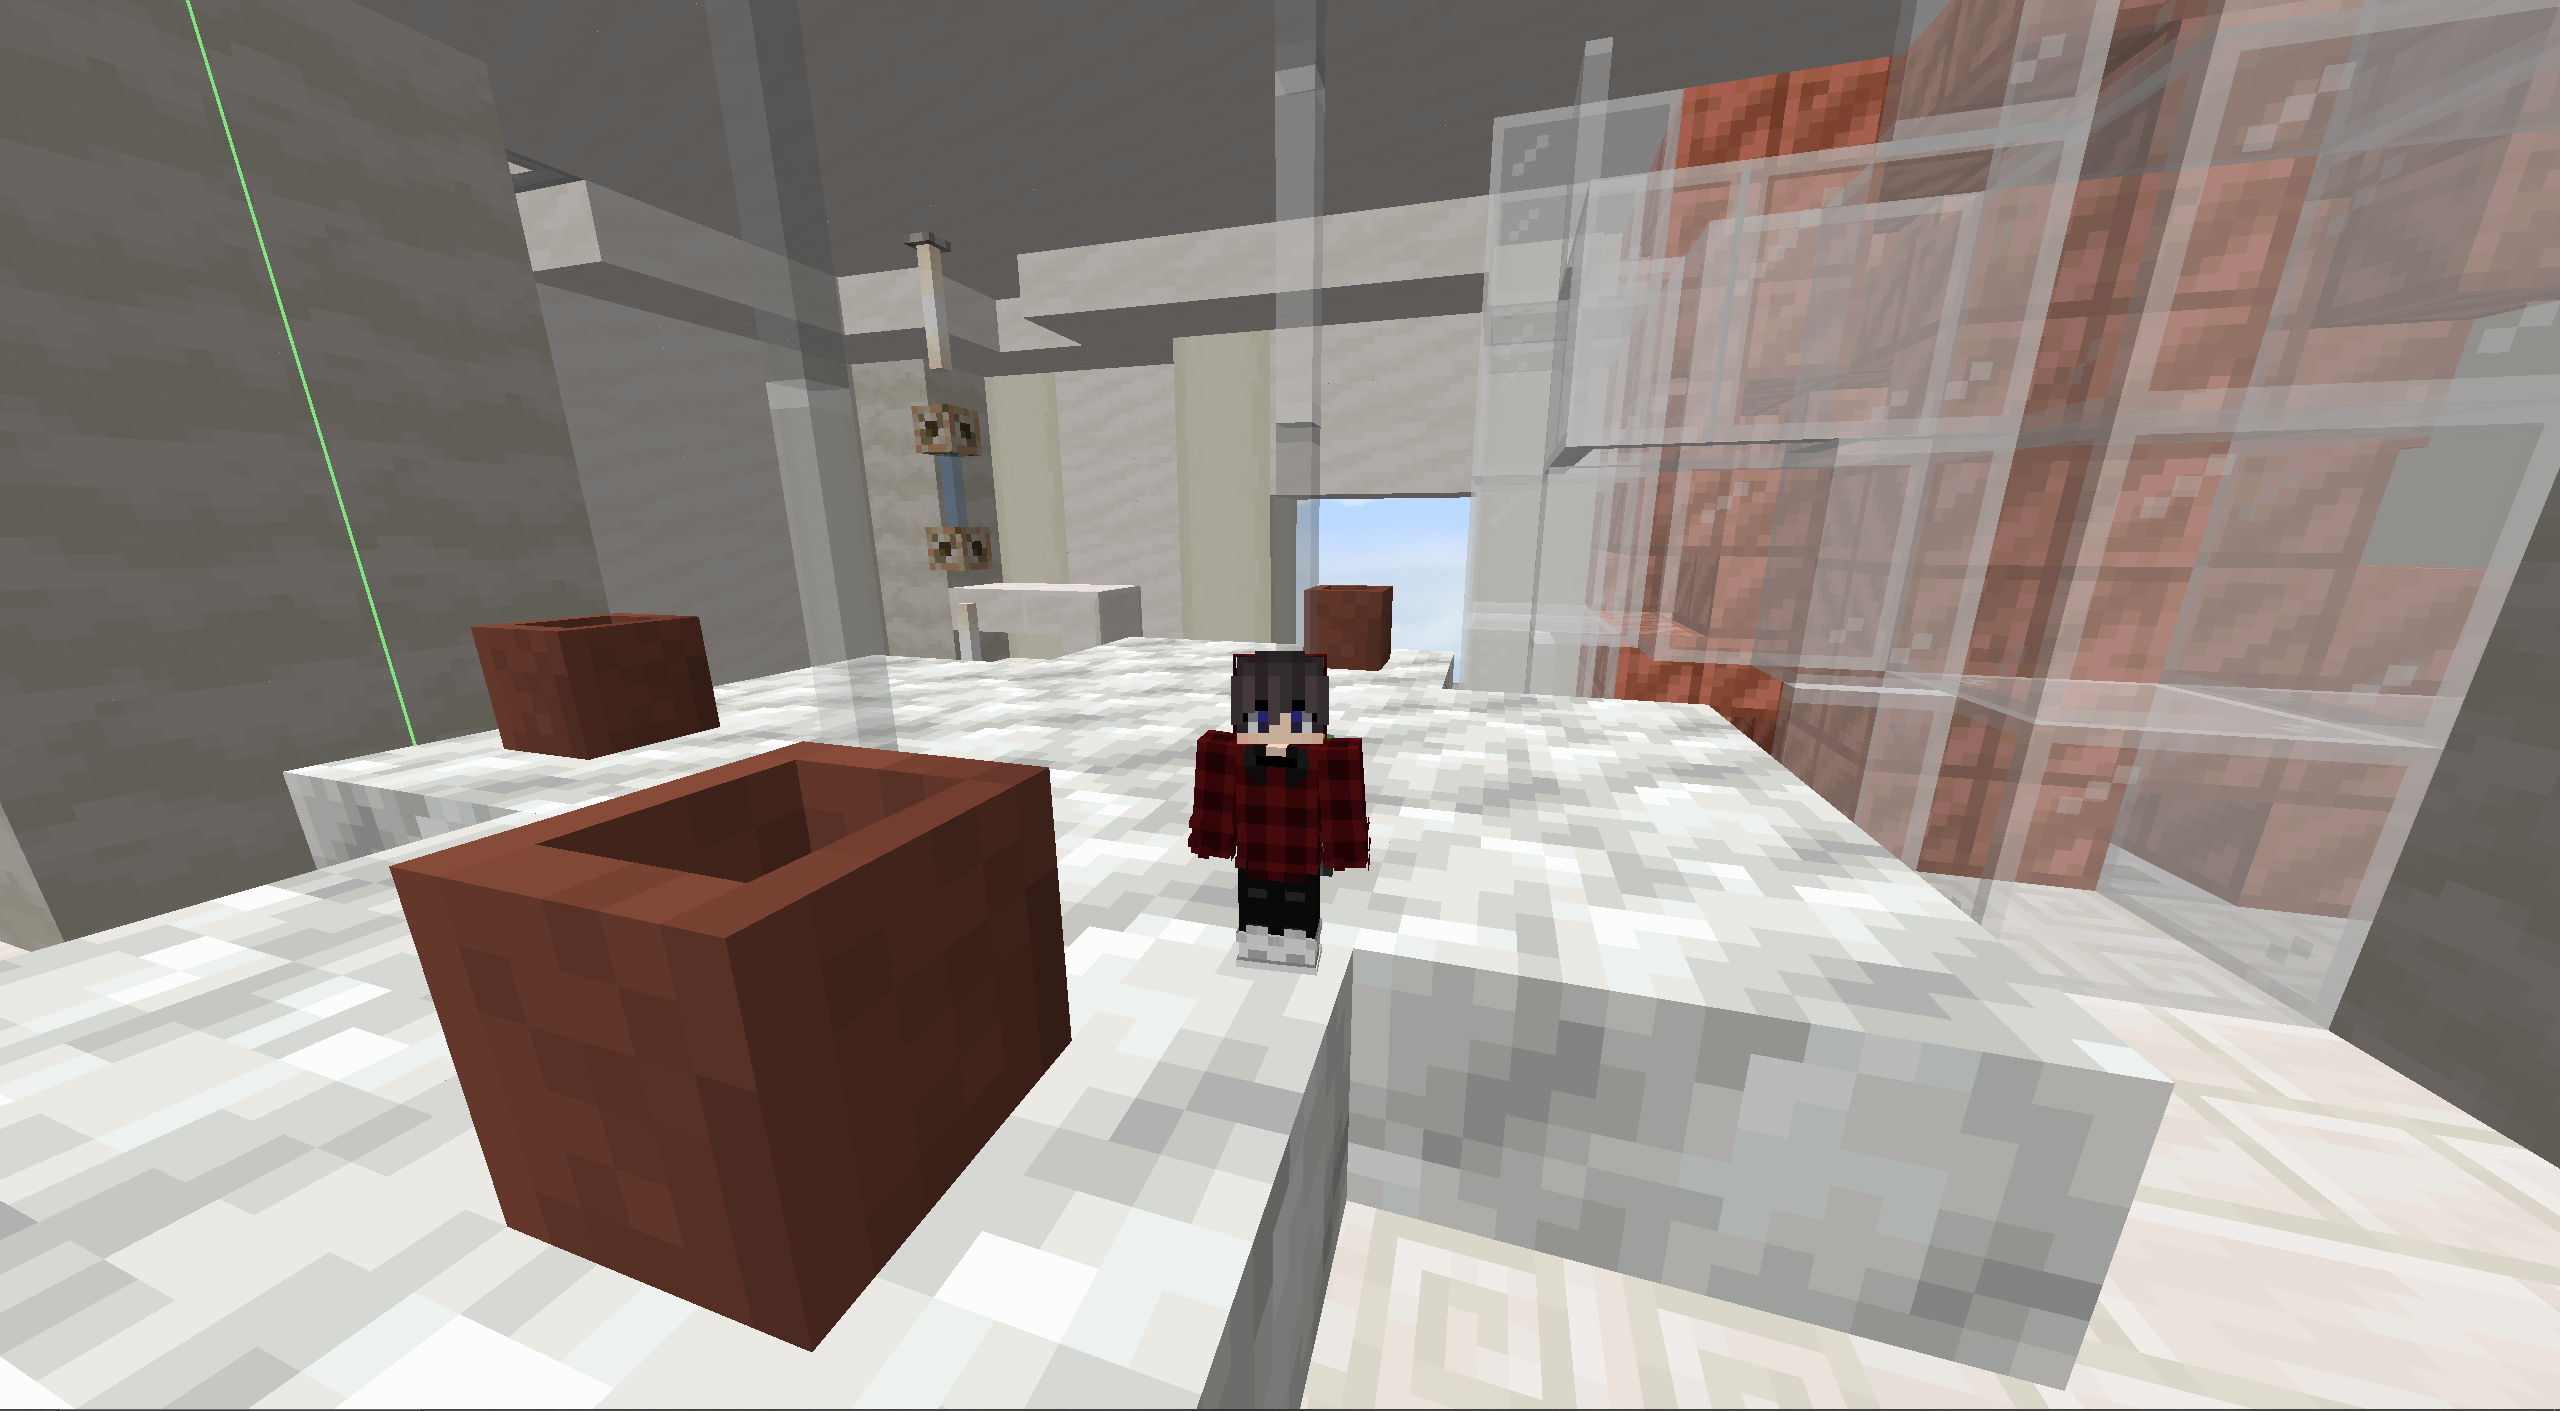
Want shrink down your building into a mini structure? Want to feel very small inside a huge room or even create creative puzzles with it? Well, at least you can easily resize rooms now with a smooth animation.
NOTE - This converts all affective blocks into display entities! Do NOT make your room too big!
Guide
To create a resize animation enter /scaling <from> <to> <origin> <name> <time> <scale> <tag> (origin defines the center position for the scaling, name is the function name - use " " for paths, time the time in ticks the animation takes, scale is the final re-scale - use even/squared numbers like 2,4,6,... or 0.5,0.25,...)
This is a very specific module mostly used for personal use. It lets you create dynamic quest books using localization for input (so resource pack required). It also provides a hint system useful for puzzle maps or similar. Might receive more functions and better customization in the future. Let me know if it would be useful for you!
⚙️ Support & Permissions
You need help setting everything up? Questions to a specific module? Ideas for future features?
Join my Discord Server MCreate!
Every tool and command requires OP or a specific permission. Read more about all permissions in the official documentation (soon ~05.12).
Q: The command XY does not exist/is red?
A: Probably the module is disabled that adds your command. You can enable it via /maptools module <module> enable.
Q: The module cannot be enabled?
Q: How do i edit the generated functions header?
A: Some modules and editing headers requires the support version. You can get it from my Ko-Fi.